
Make NEW & Mend: Button Up Edition
- Carli Vergamini
- Jan 31, 2018
- 2 min read

Fun fact: I used to hate denim shirts with a vengeance. Now they make up at least 1/4 of my closet. Someday I'll probably look back at the Canadian tuxedo & cringe, but for now I'm accumulating more of its close cousin- the army green button up.
I recently snagged this Madewell version (which a quick Google search informed me originally retailed for about $88) from the nearest Buffalo Exchange for a mere $19.99. There are a couple small stains & tiny bleach splatters that I didn't notice until after I got it home & washed it, but I think it just adds to the patina that this little DIY is going to give.
I’m making a valiant effort to jump on the secondhand shopping train whenever possible/appropriate. The more I work with repurposed materials, the more it makes sense that thrifting is essentially the most eco-friendly way to shop. Sure- sometimes it’s gross, it usually takes longer, & most times if you’re looking for something super specific you won’t find it. However, if I can re-use something that’s in good condition that already exists in the world instead of making another thing from nothing- I’d rather go that route.
Find something in your closet that could use an update or grab a vintage flannel + whatever other supplies you can gather & follow along!
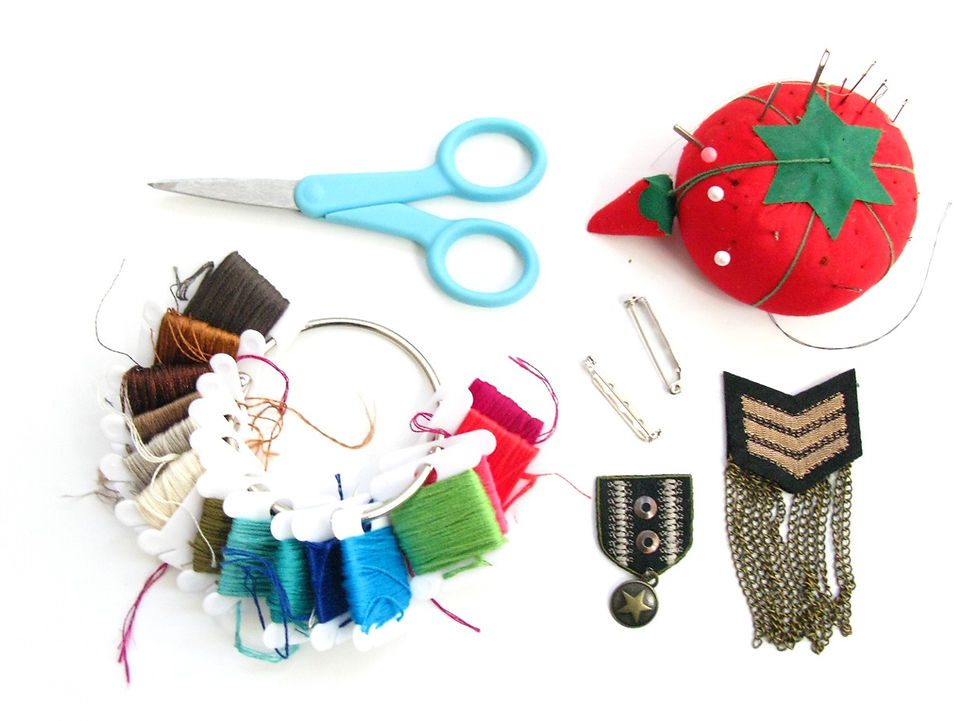
Besides a shirt, you’ll need the following:
-Scissors
-Assorted patches
-Needle
-Thread
-Embroidery floss (optional)
-Iron (optional)
-Pin backs (optional)
-Hot glue gun (optional)
This is the perfect project for an old shirt that’s acquired some stubborn stains, because you can easily cover them up!
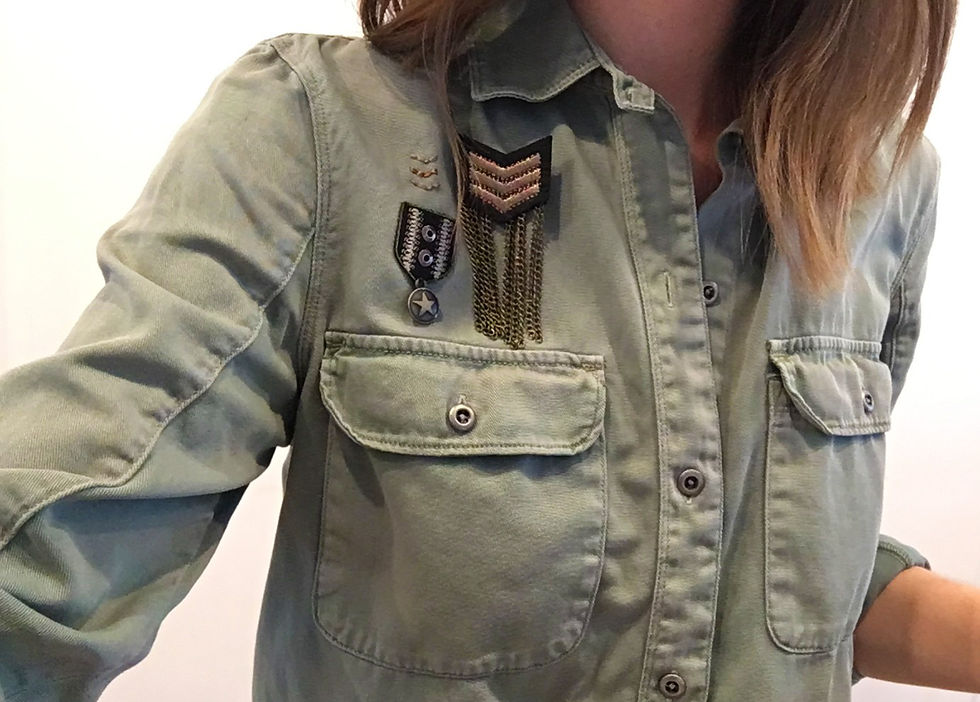
I started out by gathering a few patches I had lying around. Decided to take a military inspired theme & run with it.

Before you start planning out placement, take a peek at the back of the patches. If there’s a shiny backing, you should be able to apply it with heat. If not, you’ll have to sew by hand/machine. I took another route for the larger patch since I didn’t trust the chain embellishment to hold up in the wash.

I simply attached a pin back to the back of the patch with a needle & thread. You could also use hot glue.

Here’s where the motto, “measure twice, cut once” comes into play. Play around with the layout until your heart’s content. Once you start sewing or ironing, there’s no turning back.
Adhere the patches/embellishments however you see fit.

Rather than adding another patch to the empty space, I liked the look of some hand stitching to juxtapose the chain embellishment.
Let’s be honest, this was also an excuse to whip out my new found embroidery skills/obsession.

Keep adding to your heart's content. More is more.
Inspired? Show me how you get crafty with the hashtag #upcyclingiscool


Comments